Prepare the subject
Choose a matte object with visible texture and clear edges. Remove loose items, avoid reflective surfaces when possible, and place the subject where you can walk around it safely.
Browser workflow
RealityScan online free is a useful way to understand the capture-to-model workflow before you commit to a device or desktop setup. Start with a simple object, consistent lighting, and enough overlapping views.
A successful online workflow begins before processing. Prepare the subject, the capture space, and the files so RealityScan has consistent visual information to work with.
Choose a matte object with visible texture and clear edges. Remove loose items, avoid reflective surfaces when possible, and place the subject where you can walk around it safely.
Use steady photos from several angles, keeping the subject at a similar distance. Overlap neighboring views generously and avoid sudden changes in focus, exposure, or lighting.
A stable connection helps with online handoffs, while a modern browser and enough local storage make uploads and downloads less frustrating. Keep original images until the model is verified.
Here is a realistic pass from a physical object to a reviewable 3D result. The goal is not to force every subject through one route, but to catch problems early.
Photograph the object from low, middle, and high viewpoints, moving around it in a gradual loop. Include extra views of distinctive corners and the underside if it will be visible in the final model.
WorkaroundIf a section is hidden, reposition the object and capture it separately rather than guessing its shape.
Discard frames with motion blur, severe glare, blocked views, or large exposure changes. A smaller set of sharp, related images is usually more useful than a large mixed set.
WorkaroundRetake only the weak angles and keep the camera distance consistent.
Send the prepared images through the chosen RealityScan workflow, then inspect the geometry, texture coverage, holes, and scale. Look at the model from multiple angles before sharing or exporting it.
WorkaroundUse a second capture pass when the result has drifting alignment, missing faces, or soft detail.
The best route depends on where the images come from and how much control you need after reconstruction. These are practical workflow stages rather than promises of identical output on every device.
Use this comparison to decide whether a browser-led workflow or a more controlled local workflow better fits the project.
Online-first workflow
Quick tests, simple objects, and guided planning
Local desktop workflow
Repeatable production work and larger datasets
Online-first workflow
Prepared photos or a supported capture handoff
Local desktop workflow
Photos, video frames, or an imported image set
Online-first workflow
Fewer technical controls and less machine setup
Local desktop workflow
More control over reconstruction and cleanup
Online-first workflow
No dedicated desktop installation for the first pass
Local desktop workflow
Requires a suitable computer and configured software
Online-first workflow
Connection, upload, browser, and service limitations
Local desktop workflow
Hardware, drivers, storage, and application settings
Online-first workflow
Fast visual review of whether the subject captured well
Local desktop workflow
Detailed cleanup, measurement, optimization, and reprocessing
Online-first workflow
Lower initial friction for a small experiment
Local desktop workflow
Higher setup cost but more room to refine the workflow
A before-and-after comparison helps explain what the workflow is trying to improve: coherent coverage, connected surfaces, and a model that can be inspected from more than one angle.
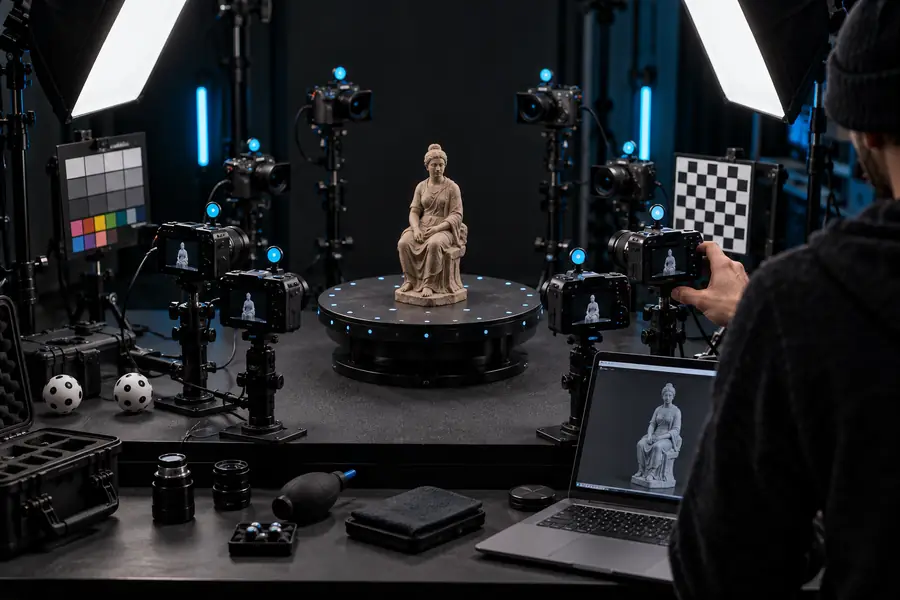

Inspect the result before export; missing coverage cannot be repaired by processing alone.
Answers to common questions about using a free online route for phone-based 3D scanning.
The best free 3D scanning app depends on your phone, subject, and desired output. RealityScan is a practical option for testing image-based capture, but sharp overlapping photos and good lighting matter as much as the app itself.
You can begin with an online-first workflow without setting up a full desktop photogrammetry environment. You may still need a compatible capture method, a browser, a reliable connection, and another application if you want extensive cleanup or export preparation.
No. Transparent, glossy, uniformly colored, moving, or highly reflective objects can produce weak alignment and incomplete surfaces. Matte texture, stable lighting, and extra views can improve the result, but some subjects need markers, coating, or a different scanning method.
Potentially, but the scan must be checked before printing. Inspect scale, wall thickness, holes, disconnected geometry, and watertightness, then repair and orient the mesh in a 3D-printing tool before slicing.